Managing Contacts
Add, edit, delete, and export the people you work with, and see each contact's order history.
Overview
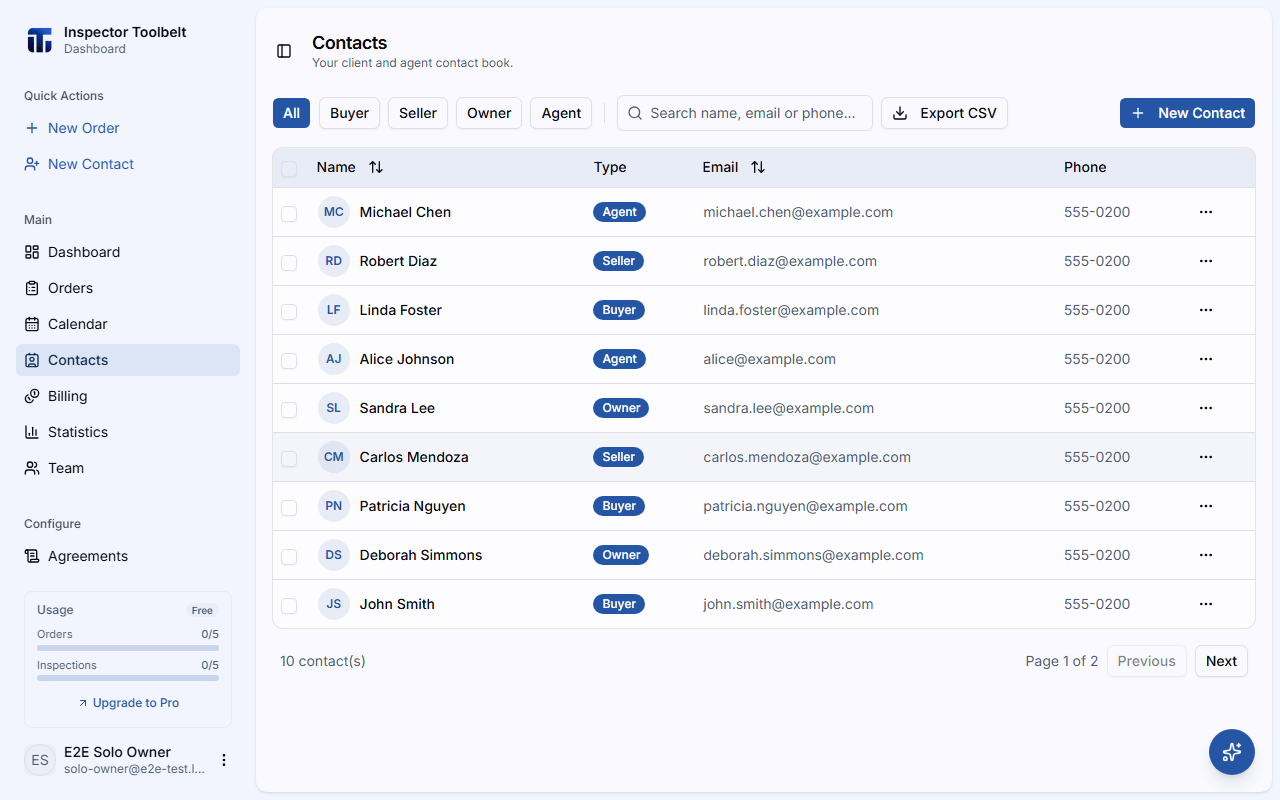
The Contacts page is your address book — the clients and other people you work with regularly. From here you can add and edit contacts, call or email them in one click, export your list, and see every Order connected to a contact.
Click Contacts in the sidebar to open it.
Before you start
- Contact types depend on your industry. For example, a home inspection account can tag a contact as a client or an agent.
Adding a Contact
Click New Contact at the top right of the contacts page. A panel opens on the right.
Fill in the contact details:
| Field | Description |
|---|---|
| First Name | Optional |
| Last Name | Required |
| Type | Check at least one type — the options depend on your industry |
| Required — used for finding this contact's Orders | |
| Phone | Optional |
Click Create. The new contact appears in the list right away.
Editing a Contact
Find the contact and click the ⋯ menu at the end of its row, then choose Edit. (You can also click the row to open the contact, then click Edit in the panel.)
Change the details and click Save.
Unsaved changes are protected
If you change a field and then try to close the edit panel — with ×, Esc, or Cancel — a prompt asks whether to Keep editing or Discard changes. Refreshing the page or closing the browser tab while the panel has unsaved changes warns you the same way. Panels that save automatically as you type, like the template item editor, skip this prompt because there's nothing to lose.
Deleting a Contact
Click the contact's row to open its detail panel.
Click Delete. The button changes to Confirm — click it again to delete the contact for good.
To delete several contacts at once, use the checkboxes on the left of each row. A bar appears at the bottom with a Delete button and a confirmation dialog.
Searching and Filtering
- Search — type in the search box ("Search name, email or phone...") to filter the list as you type.
- Filter by type — click the type buttons above the list (All plus one button per contact type) to show only one kind of contact.
- Sort — click the Name or Email column headers to sort.
Calling or Emailing a Contact
Click the ⋯ menu on a contact's row and choose Call or Email. You can also click the email or phone number shown in the list or in the detail panel — email opens your mail app, phone starts a call.
Exporting Contacts to CSV
To export everyone, just click Export CSV in the toolbar. To export only some contacts, check their rows first — the export then includes only the checked contacts.
A CSV file downloads with each contact's name, email, phone, and type. Open it in Excel, Google Sheets, or any spreadsheet app.
The Contact Detail Panel
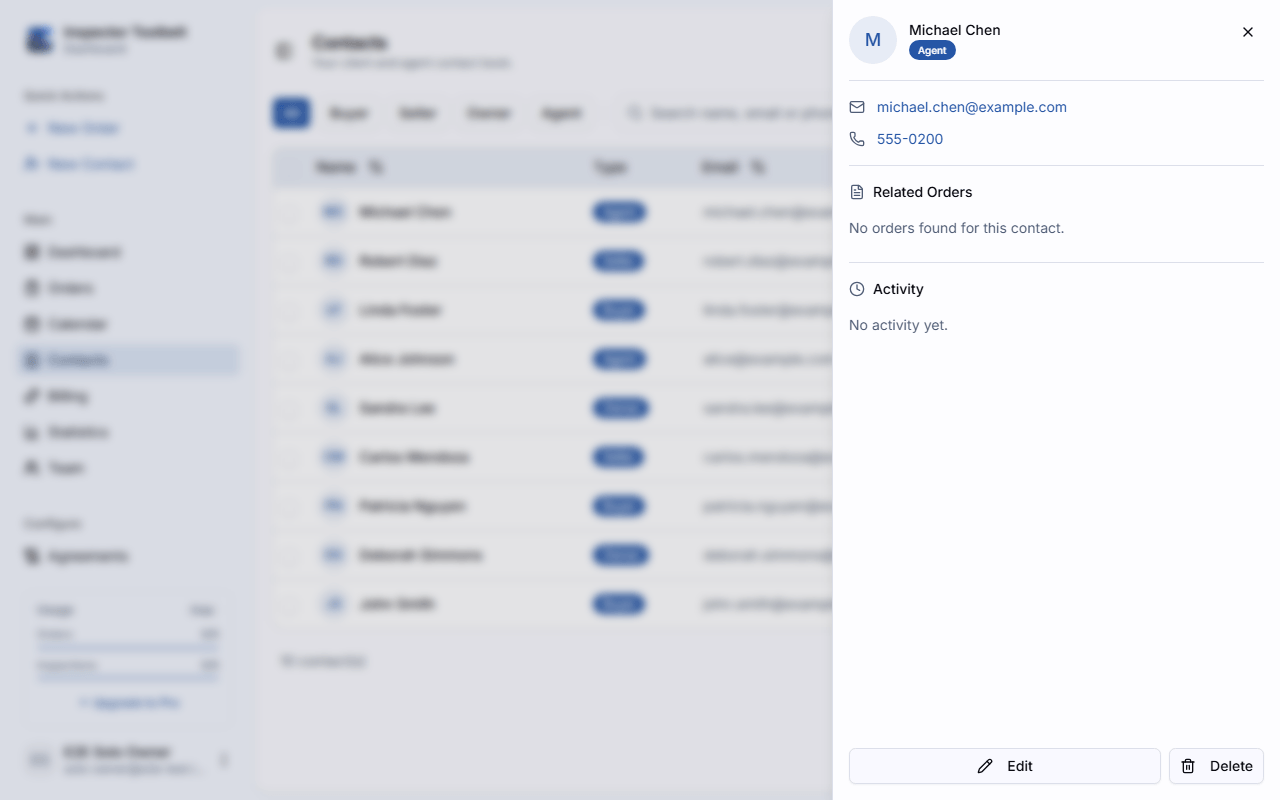
Click any contact row to open its detail panel. It shows:
- Email and phone — click to email or call.
- Related Orders — every Order matched to this contact's email address, each with a status badge. Click one to open the full Order page.
- Activity — a timeline of what's happened across this contact's Orders: created, approved, appointment scheduled, payment received, agreement signed, completed, and archived events, newest first.
- Edit and Delete buttons at the bottom.
The rest of the page stays usable
This is how every side panel across the dashboard behaves, not just this one. On a desktop-sized screen, a panel doesn't block the page behind it — you can still scroll and click the contacts list, or open the AI Assistant, while it's open — and clicking outside no longer closes it. Close a panel with its × button, Esc, or one of its footer buttons (here, Edit/Delete). While it's open, the row you opened it from stays highlighted so you don't lose your place in the list. On a phone-sized screen a panel still opens full-screen and closes the usual way.
What you should see
New and edited contacts show up in the list immediately. Each row shows the contact's name, type badge, email, and phone. Opening a contact shows its related Orders and activity timeline — if the contact has no Orders yet, you'll see "No orders found for this contact."
If something goes wrong
- The form won't save — check the highlighted fields. Last name, a valid email, and at least one type are required.
- Related orders are empty for a known client — Orders are matched by email address. If the Order used a different email than the contact, it won't show here.
- No New Contact button — your role has read-only access to contacts. See Team Roles for who can manage contacts.